A 3D Recycled Craft for Kids
Turn leftover paper, cardboard, and fabric into a miniature garden filled with three-dimensional tulips. This gentle recycled craft invites children to imagine, build, and discover how forgotten materials can bloom into something beautiful.
Music: “Origami” by Scott Buckley — CC BY 4.0 — www.scottbuckley.com.au
The Story Behind the Garden
Once there was a little red tulip waiting to bloom. It had bright ruby petals and a strong green stem, but it did not have a garden to call home. There was no soft earth, no winding path, and no small fence to protect it.
Nearby were pieces of paper, cardboard, fabric, and string that no one needed anymore. One by one, they began to change. Brown paper became soil. Green scraps became leaves. Small pieces of cardboard formed a garden path, and narrow strips became a tiny fence.
At last, the red tulip stood in the center of a garden made almost entirely from things that might otherwise have been thrown away.
Creativity can make something beautiful from almost anything.
What Children Can Explore
This activity combines storytelling, simple construction, colour planning, and creative reuse. While making the garden, children can practice:
cutting, folding, and arranging shapes
recognising colour and size relationships
planning a three-dimensional composition
working patiently through several steps
seeing reusable materials in a new way
The finished garden can be displayed on a desk, shelf, or children’s craft table.
Materials
Try to use clean materials that are already available at home.
One recycled shoebox lid or a piece of thick cardboard, approximately 30 × 40 cm
Brown recycled wrapping paper for the soil
Ruby-red and burgundy paper or lightweight card
Dark-green paper or lightweight card
A few small pieces of green fabric
Cream and natural-brown cardboard for the path
Recycled cardboard strips for the fence
Seven paper straws, or sheets of paper rolled into narrow stems
A short piece of natural jute string
Non-toxic white craft glue
Double-sided tape or child-safe glue dots
A pencil, ruler, and eraser
Child-safe scissors
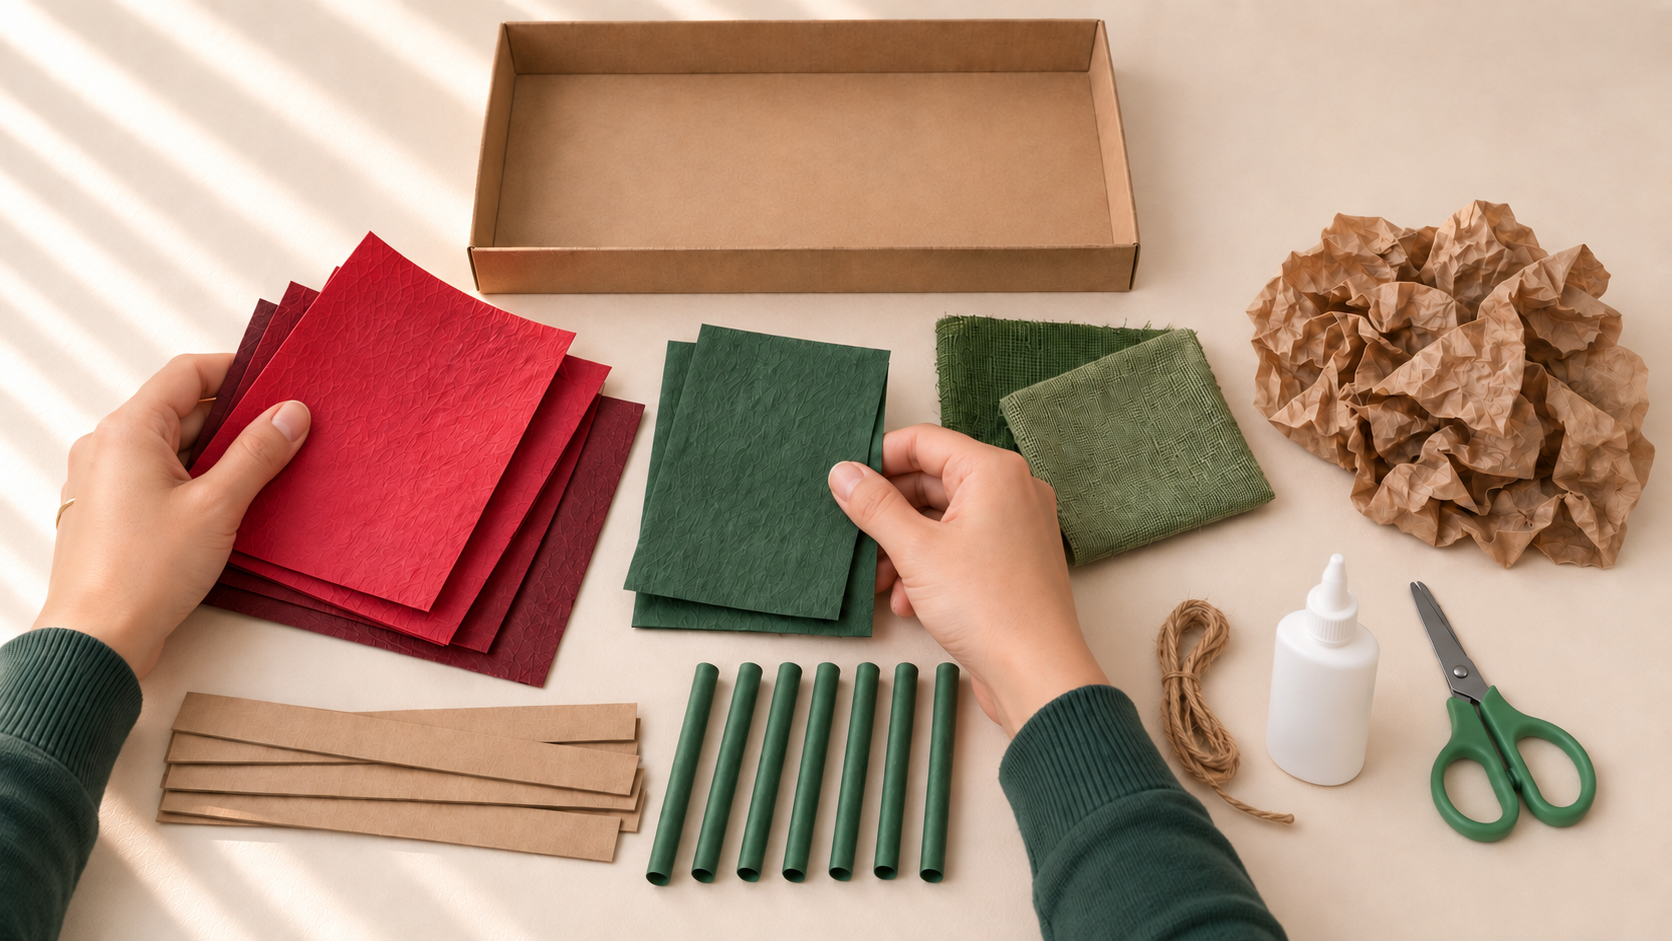
Clean recycled materials arranged in the Ruby Bloom colour palette.
Ruby Bloom Colour Palette
Ruby red — #8C1D40
Deep burgundy — #5B152B
Dark garden green — #284936
Warm cream — #E9DDCB
Natural brown — #8A6546
Keeping the palette limited makes the final garden feel calm, coordinated, and special.
Before You Begin
Clean and dry all recycled materials before use. Remove staples, sharp edges, damaged plastic, or anything that may be unsafe. An adult should cut thick cardboard and prepare any openings in the base.
We do not use hot glue, bottle caps, beads, or other very small decorations in this version of the project.
Step 1 — Gather and Arrange the Materials
Place the materials on the table and sort them by colour. Choose the best cardboard for the base and set aside the ruby-red paper for the main tulip.
Before gluing anything, imagine where the path, fence, and flowers will go. The tallest red tulip will stand near the centre, with the smaller flowers arranged naturally around it.
Vida’s little tip: Do not try to make both sides perfectly identical. A few differences in height and direction will make the garden feel more alive.
Step 2 — Build the Garden Base and Soil
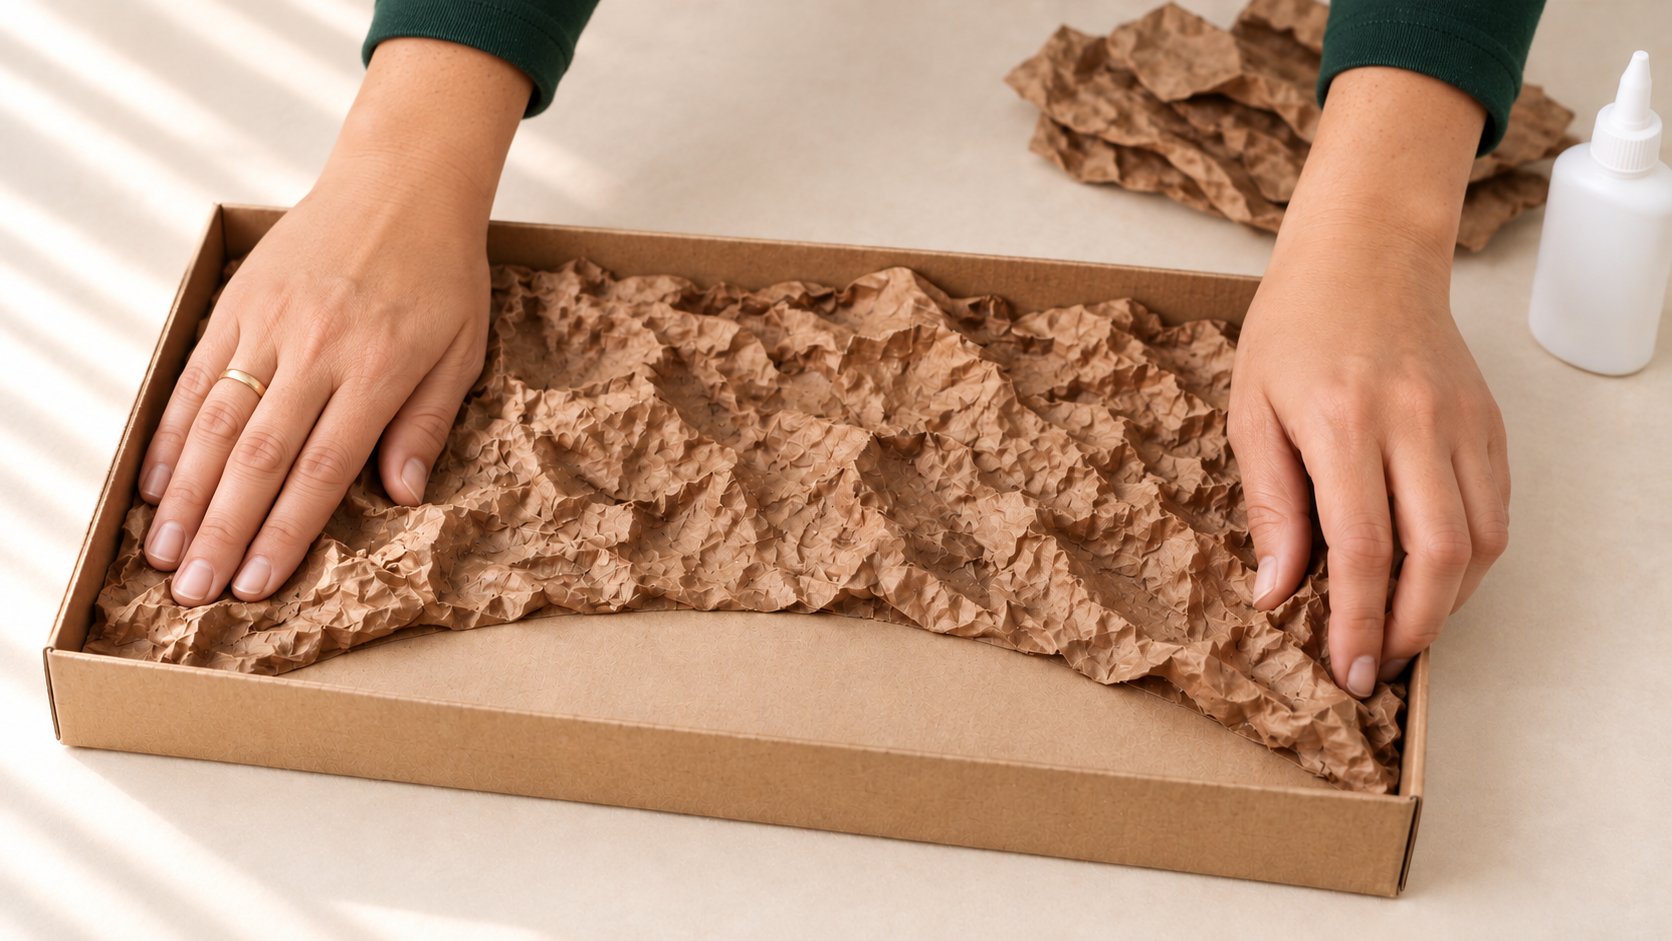
Crumpled brown paper creates a simple textured garden bed.
Use a shoebox lid or cut a piece of thick cardboard to approximately 30 × 40 cm. Gently crumple the brown wrapping paper, then open it again. The creases will give it a soft, earthy texture.
Cover the main garden area with the brown paper and glue it flat around the edges. Leave a clear space for the path leading from the front edge towards the centre.
An adult can make seven small cross-shaped openings where the flower stems will later be inserted.
Step 3 — Make the Three-Dimensional Tulips
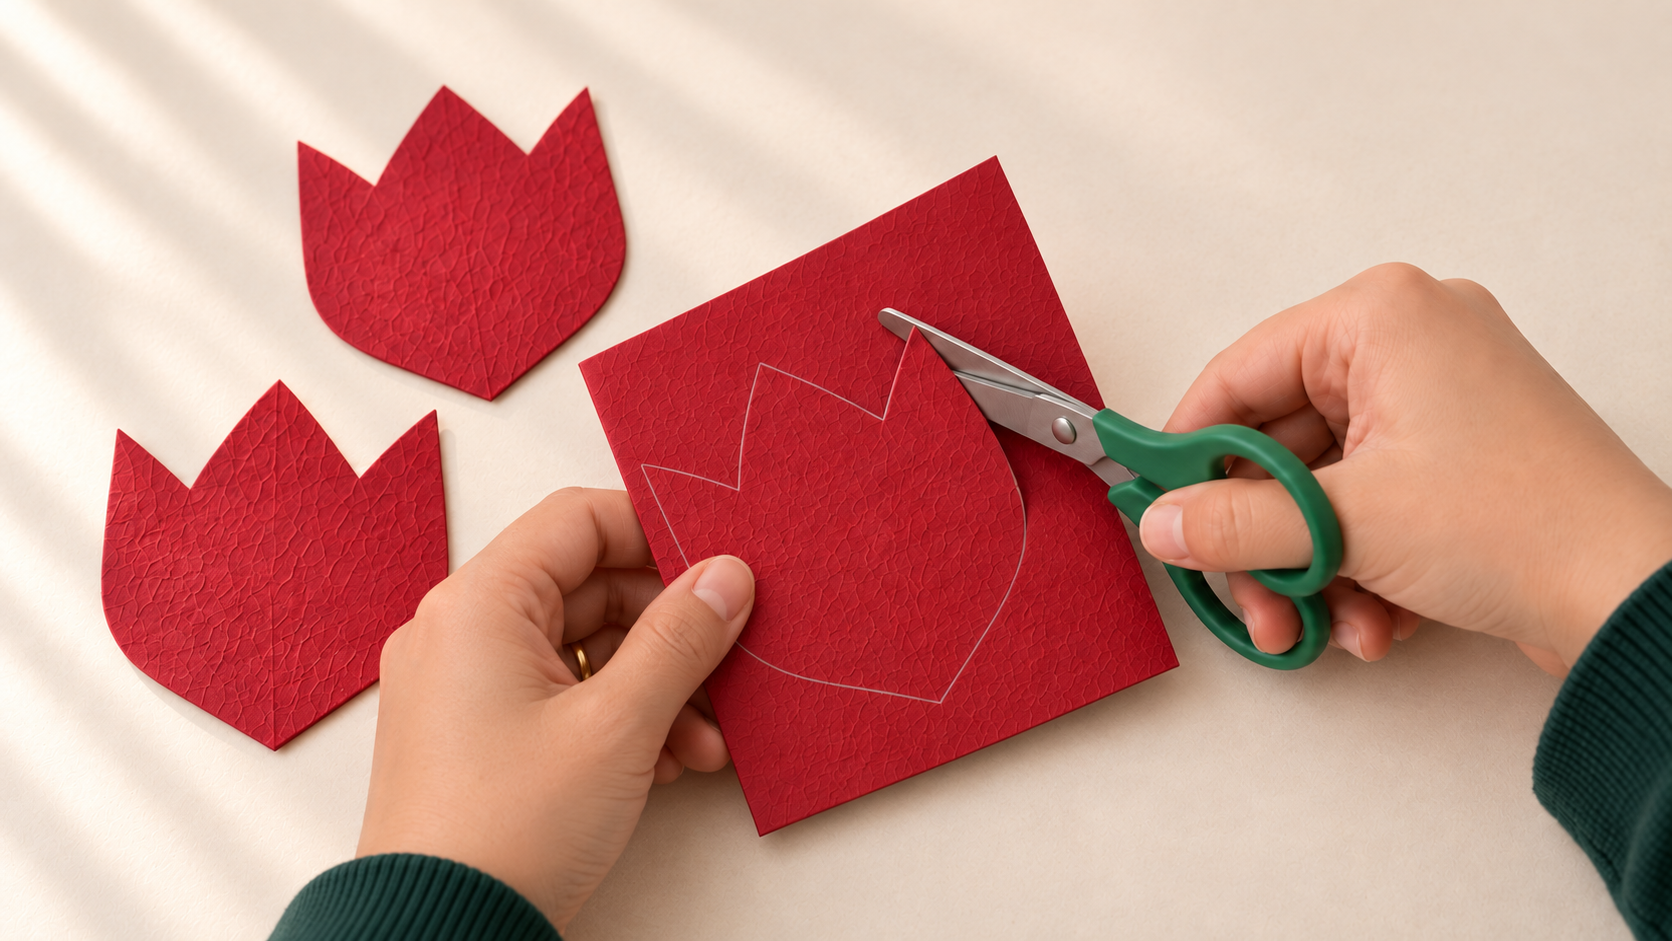
Three folded paper shapes come together to form each tulip.
For the central tulip, cut three identical flower shapes approximately 8 cm high and 7 cm wide. Fold every shape vertically through the middle.
Glue one folded half to the folded half of the next shape. Add the third piece in the same way. When the sections open, they form a simple three-dimensional tulip.
Make six smaller flowers using shapes approximately 5–6 cm high. Combine ruby red and burgundy, but keep the central flower bright red so it remains the main focus.
Allow the flowers to dry before attaching them to their stems.
Step 4 — Add Stems and Leaves
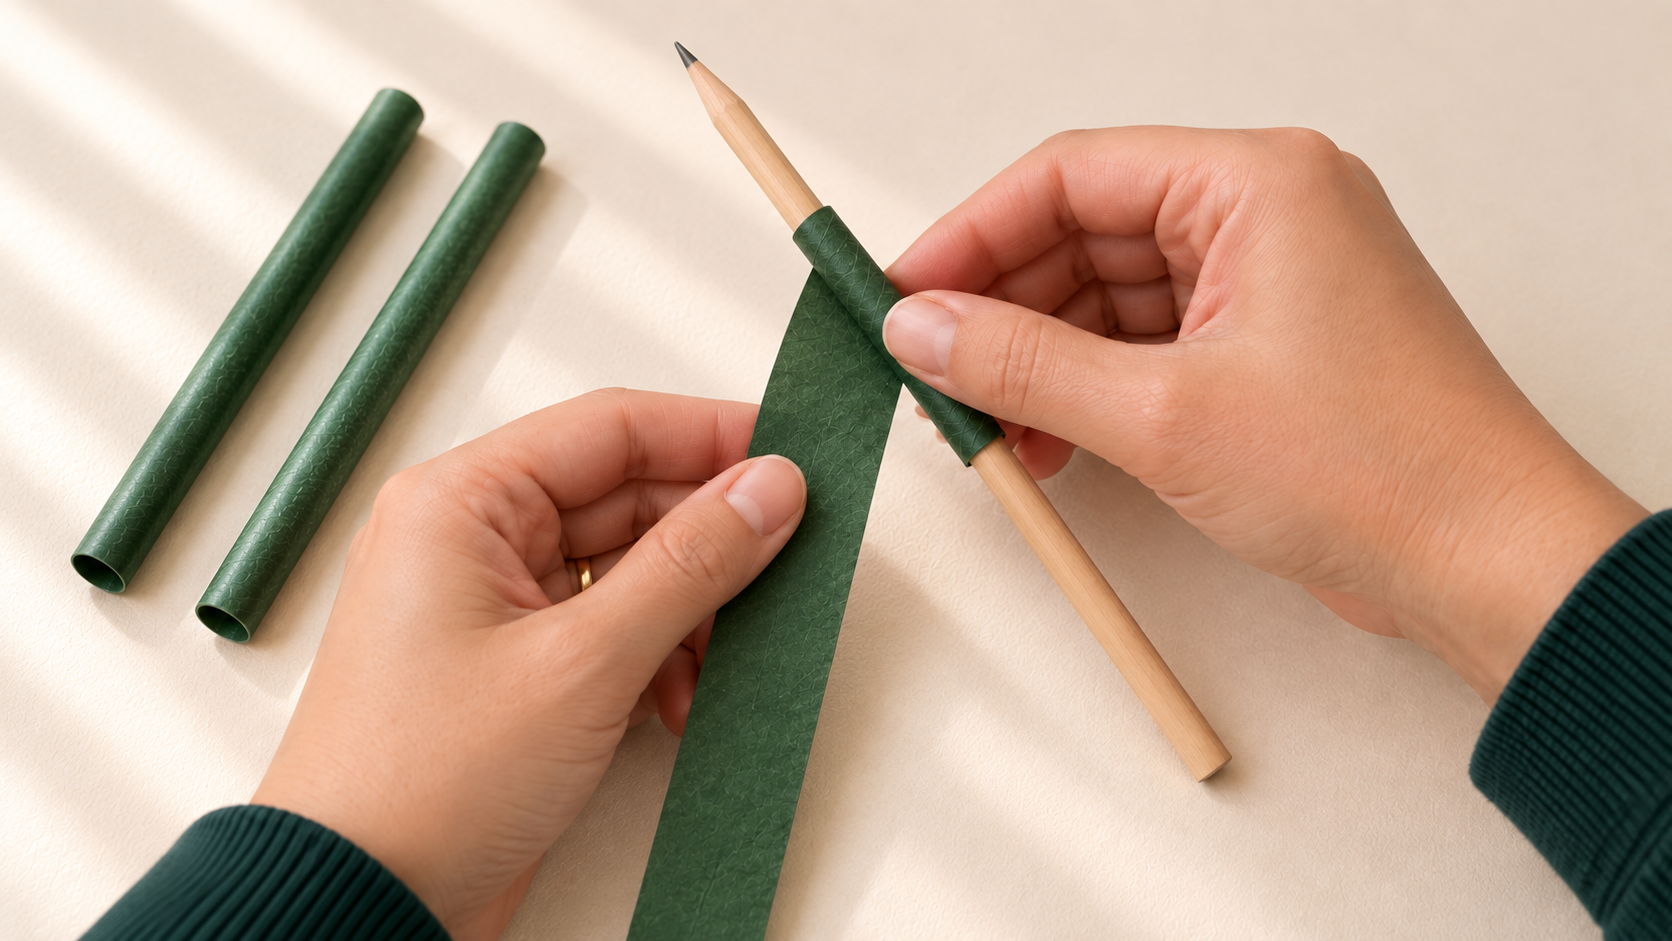
Curved paper leaves add shape and texture to the tulip stems.
Use green paper straws or roll strips of green paper into firm tubes. The central stem should be approximately 18 cm long. Cut the other stems at different lengths between 12 and 16 cm.
Create long, pointed leaves from dark-green paper. Large leaves can measure approximately 3 × 12 cm, and smaller leaves approximately 2.5 × 9 cm.
Pull each paper leaf gently over the side of a pencil to give it a natural curve. Add a small piece of green fabric to a few leaves for texture, then glue the leaves to the lower parts of the stems.
Attach one tulip head to the top of each stem.
Step 5 — Create the Path and Fence
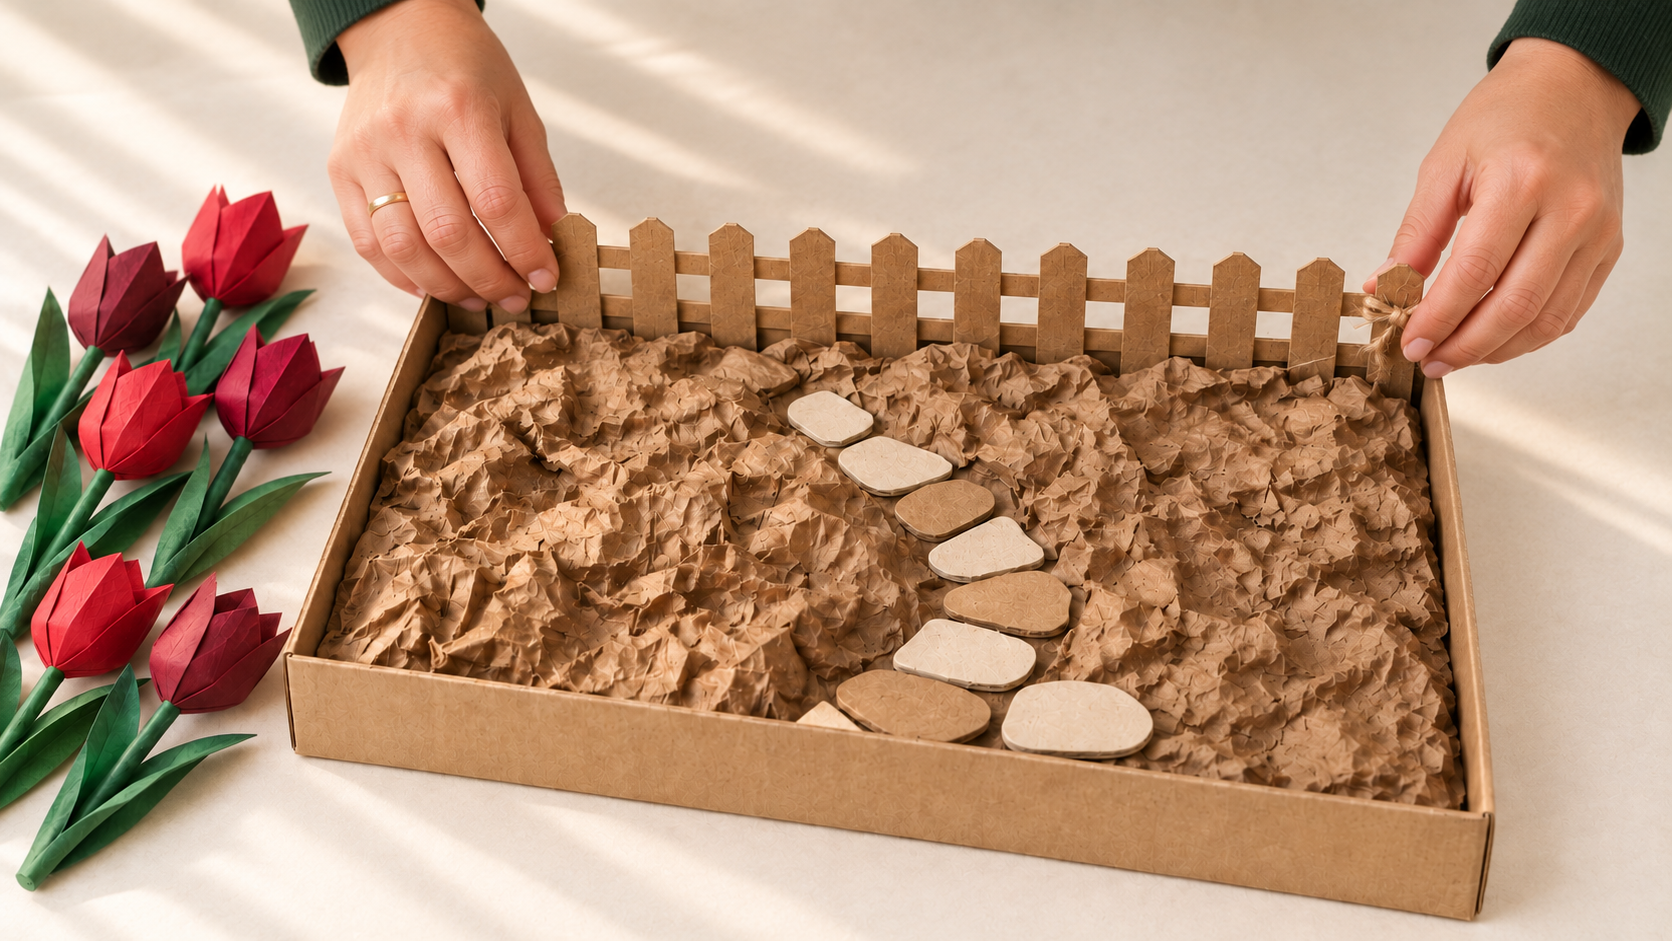
A winding cardboard path leads towards the central flower.
Cut irregular stepping-stone shapes from cream and brown cardboard. Arrange them in a gentle curve from the front of the garden towards the central tulip. Leave a little space between the stones so the brown soil remains visible.
For the fence, cut ten narrow cardboard strips approximately 6–7 cm high. Cut two longer horizontal strips and glue the smaller pieces across them. A small piece of jute string can be tied around one section as a handmade detail.
Place the fence along the back of the garden. It should frame the flowers without hiding them.
Step 6 — Let the Garden Bloom
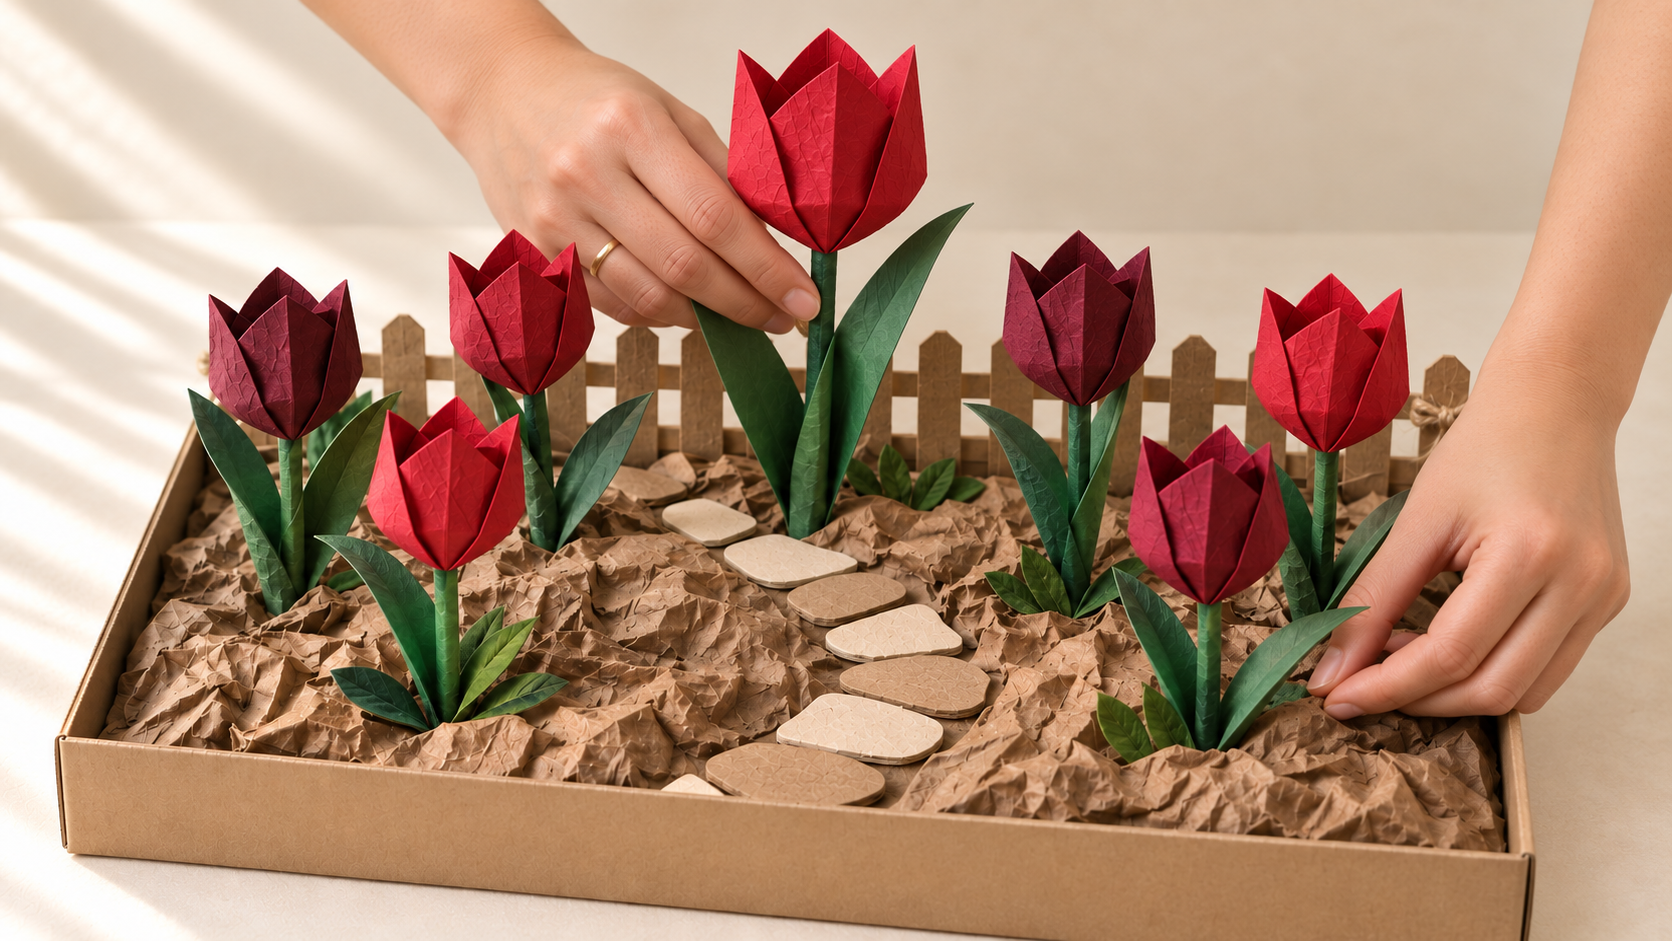
The tallest ruby-red tulip becomes the heart of the garden.
Insert the seven stems into the prepared openings. Place the tallest ruby-red tulip near the centre and arrange the smaller tulips around it at slightly different angles.
Look at the garden from the front before fixing everything permanently. Adjust any flowers that overlap too much, make sure the path remains visible, and check that the centre tulip still draws the eye.
When you are happy with the arrangement, secure the stems underneath the base with tape or glue and allow the whole project to dry.
The little red tulip finally has a garden—and materials that once seemed forgotten have been given a new story.
Make It Your Own
Every garden can look different. Children may:
write a tiny name for their garden on a separate display card
add one paper butterfly or ladybird
use fabric from an old, clean garment for selected leaves
create flowers in two coordinated colours
tell a short story about who visits the garden
Keep additional decorations limited so the red tulip remains the heart of the composition.
Safety Note for Parents and Caregivers
This project is recommended for children aged six and over with adult supervision. Adults should handle thick cardboard, sharp tools, and the preparation of openings in the base. Use only clean materials and non-toxic, age-appropriate glue. Keep scissors, string, and loose craft pieces away from younger children. This finished craft is a decorative item, not a toy.
A Final Thought from Vida
Creativity does not always begin with something new. Sometimes it begins by looking again at what we already have—and imagining what it could become.
A little imagination can help something forgotten bloom again.
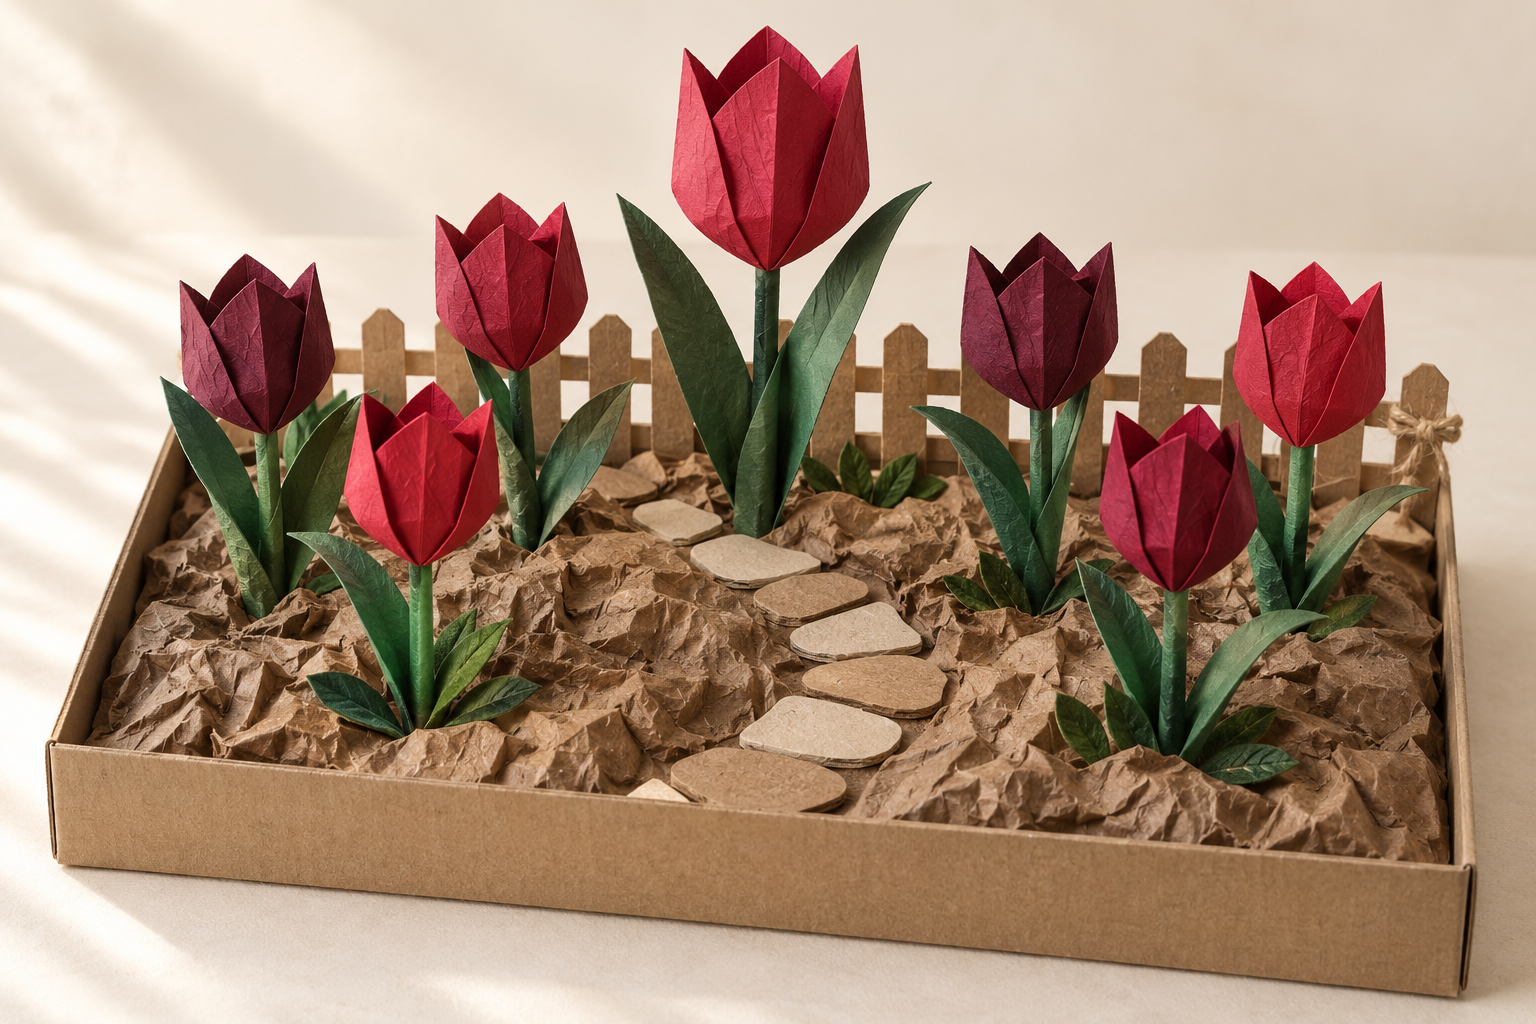
A little imagination can help something forgotten bloom again.
Watch the Garden Come to Life
A little story inspired by the Ruby Bloom garden — where a simple red flower grows into something magical.
Music: “Ruby, My Little Friend” — generated with MiniMax-Music3 via WanGP. Original concept and lyrics: Vida Workstation.
An animated Ruby Bloom story about a little girl, a red flower, and the joy of watching something grow.